
Udderly sweet, a bit crumbly, and pairs beautifully with a cold glass of milk (naturally).
Some recipes just make your heart smile, and these sweet little farm themed cow cookies do just that. I made them with my kids on a quiet afternoon, and we were all smiles when they came out of the oven. These cow cookies are soft, buttery, and marbled with cocoa in a way that looks just like our favorite pasture friends. They’re easy to make, and even easier to share, especially if you’re looking to add a little charm to a farm birthday, bake sale, or just because.
This post contains affiliate links.

Why I Make It From Scratch
I make these cow cookies from scratch because flour dust on the counter is a sign of a home well-lived in. I want my children to remember the smell of something sweet filling the kitchen, the warmth of the oven on a slow afternoon, and the joy of creating something beautiful with lots of love and a little patience.
Store-bought may be quick, but scratch-made tells a story. It says: “I took the time.” It says: “You’re worth the mess.” It says: “This is our home, and this is how we make it sweet.”
Tools you will need for Cow Cookies
- Cow-shaped cookie cutter
- Stand or hand mixer
- Mixing bowls
- Rolling pin
- Parchment Paper
- Baking sheet
- Wire rack for cooling
Cow Cookies 🐄
I’ll love you ’til the cows come home.
Yields: About 10-15 cookies (depending on the size of your cutter)
Prep Time: 20 minutes
Chill Time: 1 hour
Bake Time: 8-10 minutes

Ingredients
(Feel free to double the recipe if you want more dough to play with!)
For the Vanilla Dough:
- 1 cup (2 sticks) unsalted butter, room temperature
- 3/4 cup powdered sugar (sifted)
- 1 tsp pure vanilla extract
- 2 cups all-purpose flour (spooned & leveled)
- 1/2 tsp fine sea salt
For the Chocolate Dough:
- 1 quarter of the vanilla dough
- 1 tbsp unsweetened cocoa powder
Instructions
1. Pre-heat oven:
Pre-heat over to 350.
2. Make vanilla dough:
Cream the butter and powdered sugar together until light and fluffy (about 2 minutes). Mix in vanilla. Slowly add flour and salt. Mix until dough just comes together, don’t overmix.
3. Divide & add cocoa:
Split the dough. Set aside 3/4 of the dough for the vanilla. With the remaining 1/4, mix or knead in cocoa powder.

4. Chill the cow cookie dough:
Wrap the dough and chill for 30 minutes until firm. This helps your cookie shapes hold up in the oven.
5. Roll out the vanilla dough:
On a piece of parchment paper, roll out the vanilla dough to 1/4″ thick.

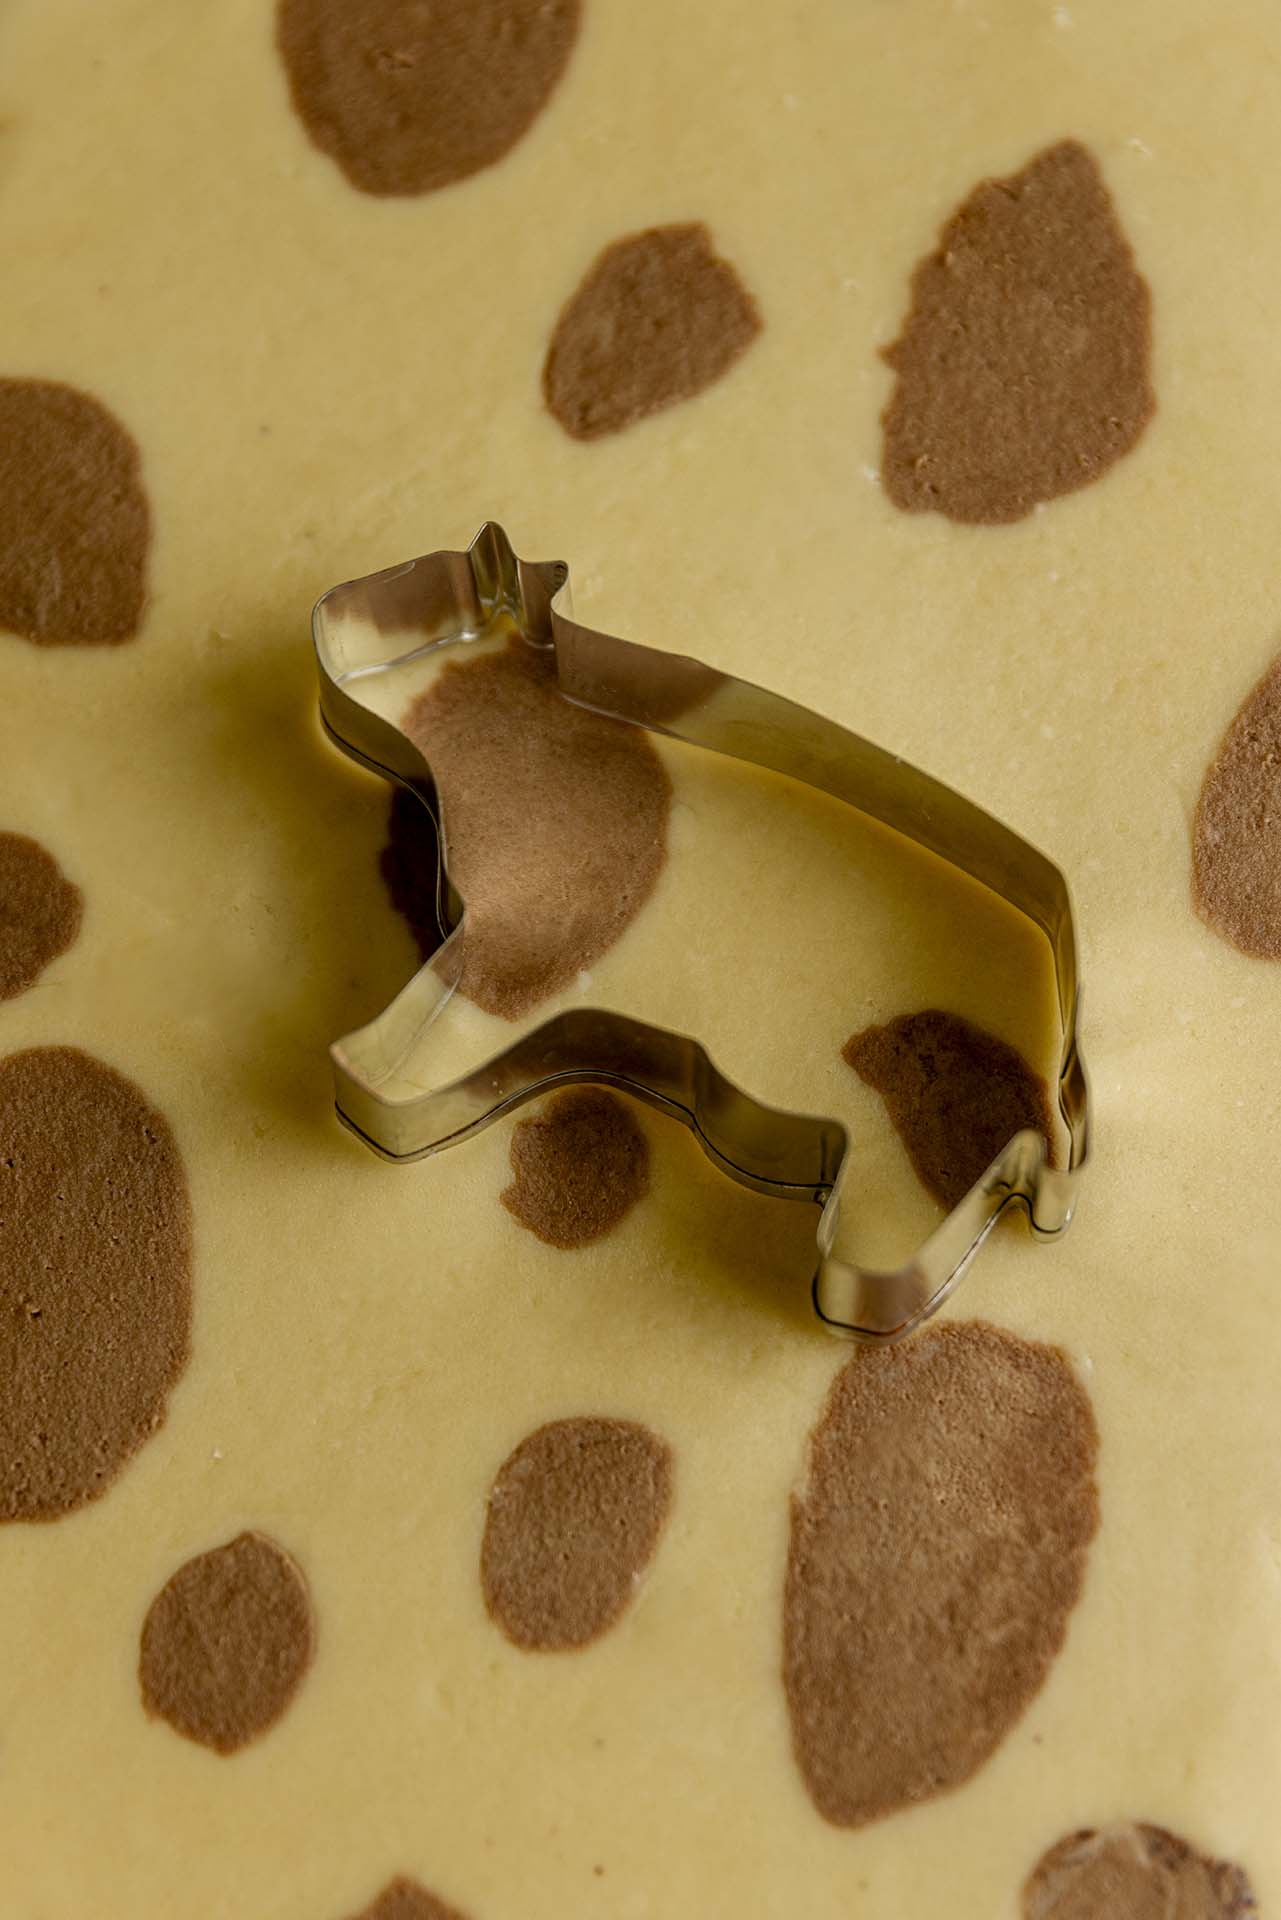
6. Marble the dough for cow cookies:
Tear off rustic chunks of the chocolate dough and scatter them over the rolled-out vanilla dough like patches. Lay a sheet of parchment paper on top, then gently roll the layers together, just enough to blend the edges and create that signature marbled “cowhide” look. Be careful not to overwork the dough, the charm is in the contrast. Patchy is perfect. (Feel free to pop the dough in the freezer for a few minutes if it starts to get too soft during this step.)

7. Cut & bake cow cookies:
Cut the dough with your cow cookie cutter and transfer to a baking sheet. Bake 8-10 minutes until the edges are just barely golden. Cool on the tray for 5 minutes, then transfer to a rack.


Tips for Cow Cookie Success
• Don’t overmix the dough.
• Chill the Dough Well. Cold dough helps the cookies hold their cow shape and keeps the edges clean when baking.
• Go Light on the Marble. Too much mixing and you’ll lose the spotted cow look.
• Roll Evenly. Keep your dough thickness consistent, about 1/4 inch is perfect. This helps the cookies bake evenly.
•Watch Closely Near the End. These cow cookies go from perfectly golden to a bit too brown quickly. Start checking around the 6 minute mark and pull them when the edges just start to turn color.
• Let Them Cool Before Moving. They’ll be a little fragile fresh out of the oven. Give them 5 minutes to firm up on the baking sheet before transferring to a wire rack.
• Have Fun With It. Let the kids get in there and make a mess. Make a whole herd of cookie cows. Some wild, some classic. Perfection isn’t the goal, sweet memories are.

Cow Cookie Serving Suggestions
- Serve with a cold glass of milk.
- Serve warm for an extra melty bite.
- Perfect for parties. Kids’ birthdays, baby showers, or homeschool co-ops with a barnyard theme.
- Wrap in twine as a gift. Stack 3–4 cookies in a clear bag or brown kraft box, tie with twine, and add a tag that says “You’re Udderly Sweet.” They make darling gifts for neighbors, teachers, or just-because treats.
- Enjoy with afternoon tea or coffee.

Storage & Freezing
- Store up to 5 days in an airtight tin at room temperature.
- Freeze up to 2 months —just wrap well.
Frequently Asked Questions
- Can I make the dough ahead of time?
Absolutely! The dough can be made up to 3 days in advance. Just wrap it well in plastic wrap and store it in the fridge. When you’re ready to roll, let it sit on the counter for 10–15 minutes to soften slightly. - Can I double the recipe? Yes! It is encouraged since this is a marbled cookie, you will have more dough to play with and get a higher yield.
- How do I get that cowhide look?
The trick is in the marbling! Don’t overmix the chocolate and vanilla doughs. Just press together small bits, twist gently once or twice, and then roll. It should look patchy and rustic, not uniform. - What do I do with the dough scraps after cutting out the first round of cookies? Gently press the leftover dough together without kneading or overworking it. Wrap it in parchment and chill it for 5–10 minutes to let it rest. This helps the butter firm up again and keeps your cookies tender. Then gently roll it out just like before and keep cutting. Repeat this process. The first batch will look the cleanest, but a rustic looks works like a charm!
- Do these cookies spread in the oven?
Not much, especially if the dough is well chilled. For crisp edges and defined cow shapes, make sure your dough is cold when it goes in the oven, and don’t skip the chill time.
A Note from My Kitchen Table
These cow cookies are a love letter to simpler times. To aprons and wooden spoons. To messy kitchens, and little hands stealing dough. They remind me that baking doesn’t have to be perfect to be beautiful. And maybe that’s the real secret to a homemade life. It’s not about getting every detail right. It’s about making something with heart, and a little pasture raised love.
If you make these, tag me over on Instagram @ourlifehomemade. I’d love to see your herd of cookies. 🐄

Shop the Post

Leave a Reply