
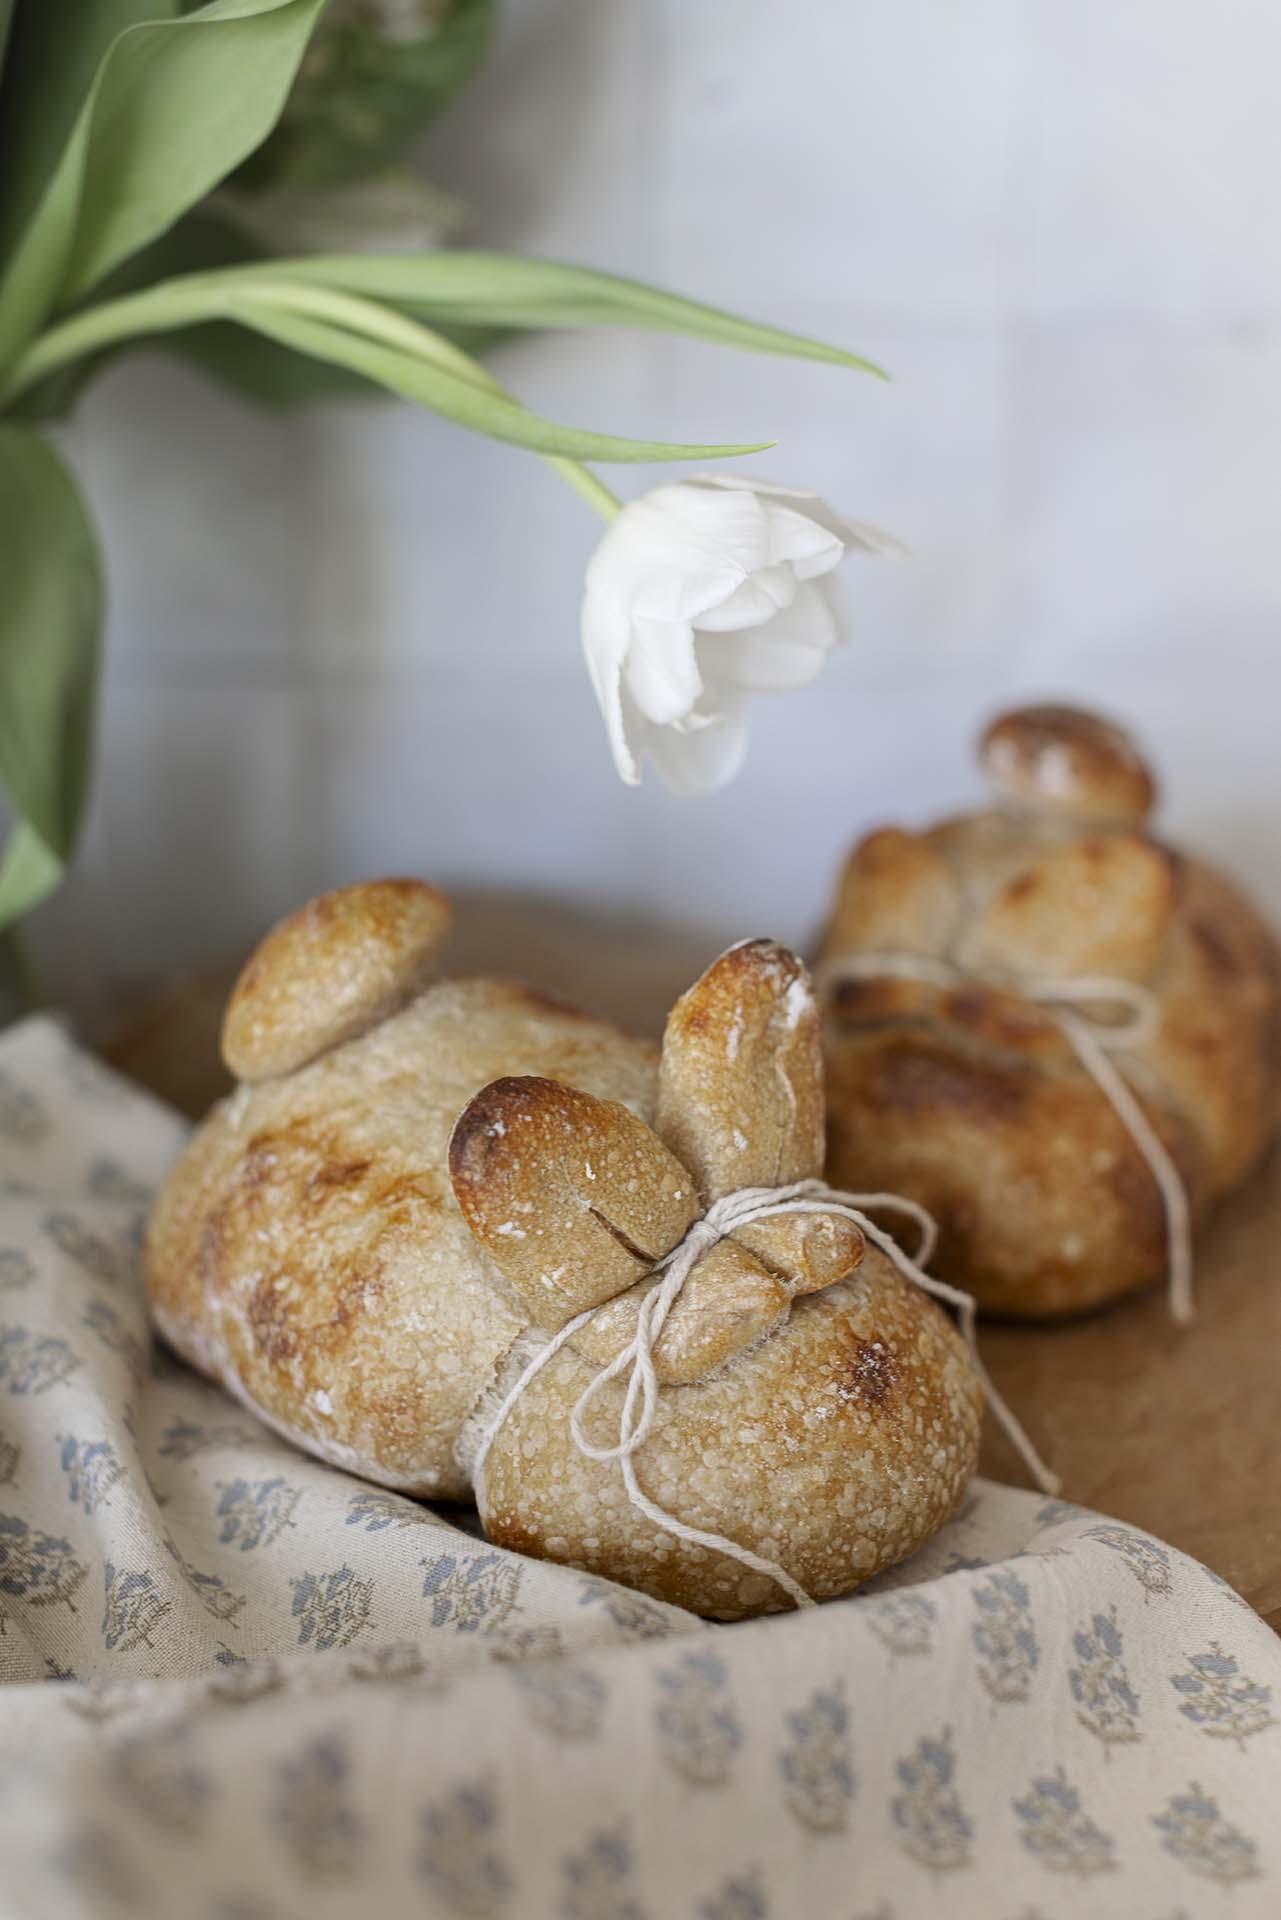
How adorable are these rustic whole wheat sourdough bunny loaves? They would make the perfect addition to your Easter table, or the sweetest gift. In this post, you will find detailed, step by step instructions on how you too can bake rustic whole wheat sourdough bunny loaves of your own.
What You will Need:
- Digital Kitchen Scale
- Dough Hook and Bowl if Mixing by Hand Or –
- Stand Mixer
- Two 8 Inch Oval Proofing Basket For Best Results
- Baker’s Twine
- Parchment Paper (I love King Arthurs)
- Dutch Oven (Save | Splurge!)
Ingredients:
- 60 Grams Fed Sourdough Starter
- 470 Grams Filtered Water
- 16 Grams Salt
- 260 Grams Whole Wheat Flour
- 390 Grams Bread Flour
Instructions:
Feed Your Starter.
Activate your sourdough starter roughly about 4 hours before starting your loaves. The ideal time to use your starter is when it has reached its maximum rise, or before it starts to fall again. You can read more about how to create and maintain a sourdough starter here.

Mix dough/Autolyse
Start by combining 60 grams of your well-risen starter with 470 grams of water using a dough-hook and bowl, or a stand mixer with the paddle attachment. Next, gradually incorporate 260 grams of whole wheat flour and 390 grams of bread flour into the mixture, making sure it is fully integrated. Once the dough is well-mixed, cover it with a damp towel and let it rest for at least 30 minutes.
Add the Salt and knead
The next step is to incorporate the salt. Add in 16 grams of salt and mix it into the dough until well combined. (If using a stand mixer, switch to a dough hook.) At this point, you can knead the dough for 5-10 minutes. Kneading develops the gluten strands in the dough, making it smooth, stretchy and elastic. If you are unable to knead the dough, you can skip this step entirely, and instead perform 3-5 rounds of stretch and folds, every 30 minutes. I prefer to do a hybrid with my stand mixer with a couple stretch and folds mixed in. For me, this yields the best results, and I’m not committed to the dough all day.
First Prove
The purpose of this first prove is to allow your dough to develop gluten, flavor, and structure. Cover your bowl with a damp cloth and allow it to rest in a warm spot for 8-10 hours, or until it has doubled in size. For these loaves in particular, I left the dough on my counter over night starting about 11 PM and then finished the proof in my oven with Proof Mode turned on, to give it a little extra warmth and speed things along. It took 10 hours for my dough to rise double in size.

Portion THE Dough
Divide the Dough into two equal portions
Lay your risen dough flat on a floured surface. With a bench scraper or knife, cut your dough in half to form two loaves.

Portion off the tail and ears
Cut a 1/6th portion off each end of each loaf. This will be the dough used to form the the tail and the ears.

Portion the Tail and Ears into Thirds
When portioning the dough for the ears and tail, cut about one inch of the dough for the tail and simply divide what is remaining for the ears. I like to keep everything on the smaller size to allow for a nice pop and rise during the bake. I’ve found when the ears are too long, they bake more flat.

Pre-Shape
Roughly pre-shape your loaves and pre-shape the smaller portions (the tail and ears) into balls. Allow everything to rest for one hour.

Shape
After rest, shape your main loaves. Place the loaves into 8 inch oval proofing baskets, seam side up.
Shape the tails into round balls folding the dough under itself. Shape the ears by folding the dough in half. Place the tail and ears on a separate plate, seam side down.


Second Prove – Bulk Fermentation
Cover your proofing basket and plate with the tail and ears, and place in the refrigerator for 2-24 hours. For this set of loaves, I only rested for two hours.

Pre-heat Oven and Dutch Oven
When your bread is ready to bake, preheat your oven to 480 degrees. Place your Dutch Oven inside and preheat it for 30 minutes. Remove the dough from the fridge.
Final Shape
Place your loaf on a piece of parchment paper. Place a piece of baker’s twine underneath the loaf, about 1/3rd of the way down from the top.
Fold the ears in half and place them seam side up on top of the loaf. Place the tail directly behind the ears. Lightly tie the ears to the loaf with the baker’s twine.

Bake With steam for 15 minutes
Immediately after you assemble your bunny loaf, place it in your dutch oven with the parchment paper. Put the lid on top to introduce steam, and bake for 15 minutes at 480 degrees. The steam will help build a nice crust on the bread.
Bake Without Steam for 15 minutes
Remove the lid from your dutch oven and continue baking for another 15 minutes, or until richly golden with a nice, crispy crust. Keep an eye on the loaf, and if any hot spots start occurring, place aluminum foil over them to prevent any burning. It can get pretty hot spotty once your remove the lid. Also – I’ve baked several of these loaves and none of them cracked from not scoring! Remove the loaf from the oven when done, and enjoy your beautiful rustic whole wheat sourdough bunny loaves!


Leave a Reply